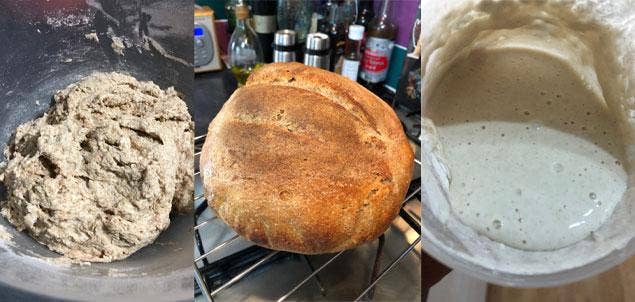
Bread - A social, religious and cultural staple
Bread is one of life‘s greatest gastronomic pleasures and one of the world‘s oldest, and simplest, foods. Man has been making bread for thousands of years, from the unleavened flatbreads cooked on the ashes of a Bedouin fire through to the handcrafted sourdoughs produced in modern, artisan bakeries - and everything in between.Bread has linked cultures for centuries, since grain was first crushed and moistened then hardened over fire and dried into tablets. These dense slabs kept well and were ideal for nomadic Man to carry as he travelled or hunted. The Egyptians took it a stage further when it was noticed that wetted and crushed grain started to bubble if it was left in a moist, warm atmosphere. If this fermenting mixture was mixed with more grain before cooking it produced an aerated, or leavened, bread – the birth of modern yeast–risen loaves.
From these simple origins breadmaking continued to develop and diversify and to shape the communities and cultures who baked it. Bread became a currency, it was worshipped and cherished, it generated community ovens and granaries and it developed social, religious and economic significance like no other food. It is indeed the staff of life.
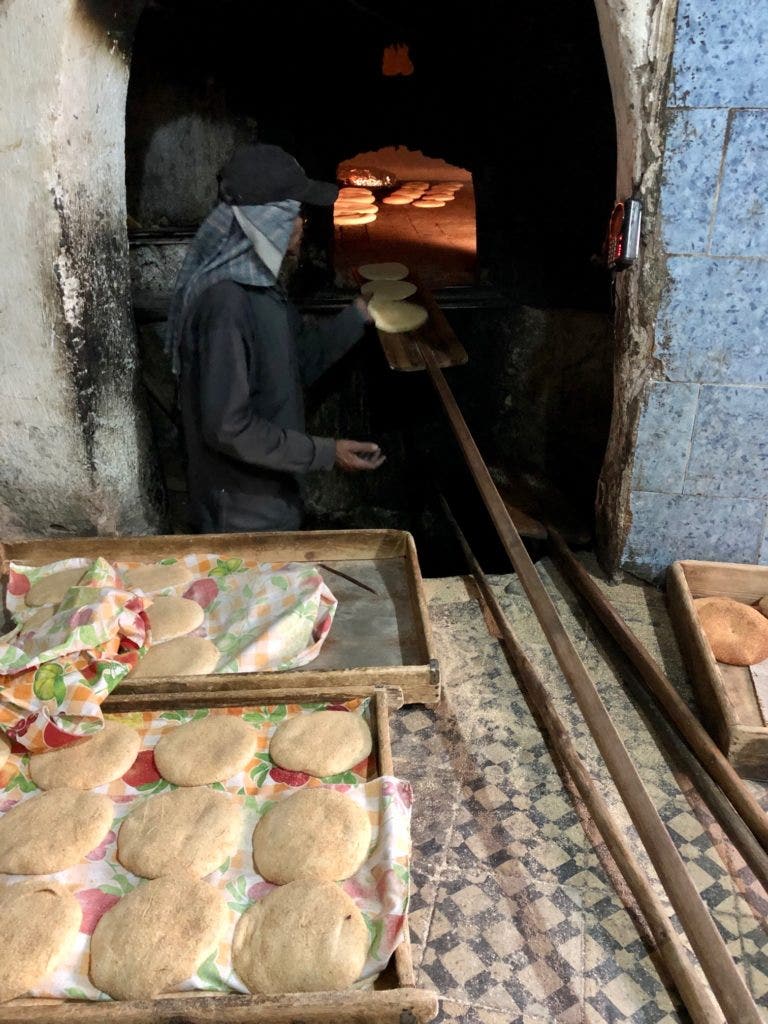 A community oven, or feran, in the Marrakech medina. Locals bring their prepared dough to be baked every morning and afternoon.
Indian chapatti, paratha and naan; Armenian lavash; Mexican tortilla; French baguette, fougasse and brioche; Italian ciabatta and focaccia; British bloomer and cob; Ethiopian defo dabo; Eastern European rye bread…Every culture has its own traditions, and with an almost unlimited variety of flavours and ingredients you can add, bread is really only limited by your imagination. Going back to absolute basics, bread is really just flour and water, with salt important for taste and yeast if you want it to rise.
The horror of the Chorleywood Process
These four ingredients create the most wonderful culinary staple, or it should, but for bread purists it all went pear shaped with the development of the Chorleywood Process in the 1960s. This revolutionised and commercialised the whole breadmaking industry by using cheap, low protein flour, chemical improvers, anti–fungal agents, fats and a rapid mixing and fermentation to mass produce our daily ‘bread‘ and I use the inverted commas on purpose for, to me at least, this is not bread but a tasteless, difficult to digest and largely texture–free product.Even supermarket bakeries, despite the freshly–baked smell that wafts across the store to draw you in, use a scaled down version of the same process. Unless you buy bread from an artisan bakery – or bake your own – then you have never really tasted bread. And, with most artisan sources closed during lockdown, and people having more kitchen time at their disposal available there was a rebirth of proper breadmaking and of proper bread. Hallelujah!
Home breadmaking
Many home cooks, even proficient ones, are scared of breadmaking, the past few months have seen increased numbers lose that fear and begin to get to grips with it but let‘s get one thing straight, I am not going to teach you how to make bread! Even the very best bakers could not get you to produce exquisite bread in a short blog. Yes, I could give a basic lesson that would result in something edible (probably…) but creating good bread is all about understanding the whole process and quite literally feeling that process through your fingertips as you fold or knead the dough, it is highly tactile and a skill that develops with experience. The more you make bread, and the more varieties of bread you make, the better you become, practice makes perfect and all that.Some breads, for example yeast–free soda bread and basic unleavened flatbreads, are relatively easy to create but what I want to do here is go a little above the basic and share my variant of a leavened bread that is simple, foolproof, requires no kneading, can be easily baked by an inexperienced baker and which is infinitely adaptable in respect of flavour. Oh, it‘s also one of the tastiest breads you can ever make.
Welchy‘s Overnight Bread Recipe
Well, it‘s not mine really. The recipe is based on one originally created by Jim Lahey and I, like countless other breadmakers before me, have simply played with it an adapted it to my own requirements, if you make it I am sure you will do the same.Strong white bread flour is the standard go–to flour for the recipe, but I have made it just as successfully with wholemeal, and various proportions of spelt, rye and buckwheat flours, it really doesn‘t matter, but for your first time a strong white will give a superb result before you move on.
Ingredients 500g strong white bread flour 2g dried yeast 7g salt (10g if you are a salt–lover like me) 320ml lukewarm water
Method
- Mix the yeast, flour and salt in a large bowl, then add the water and stir thoroughly, do not knead!
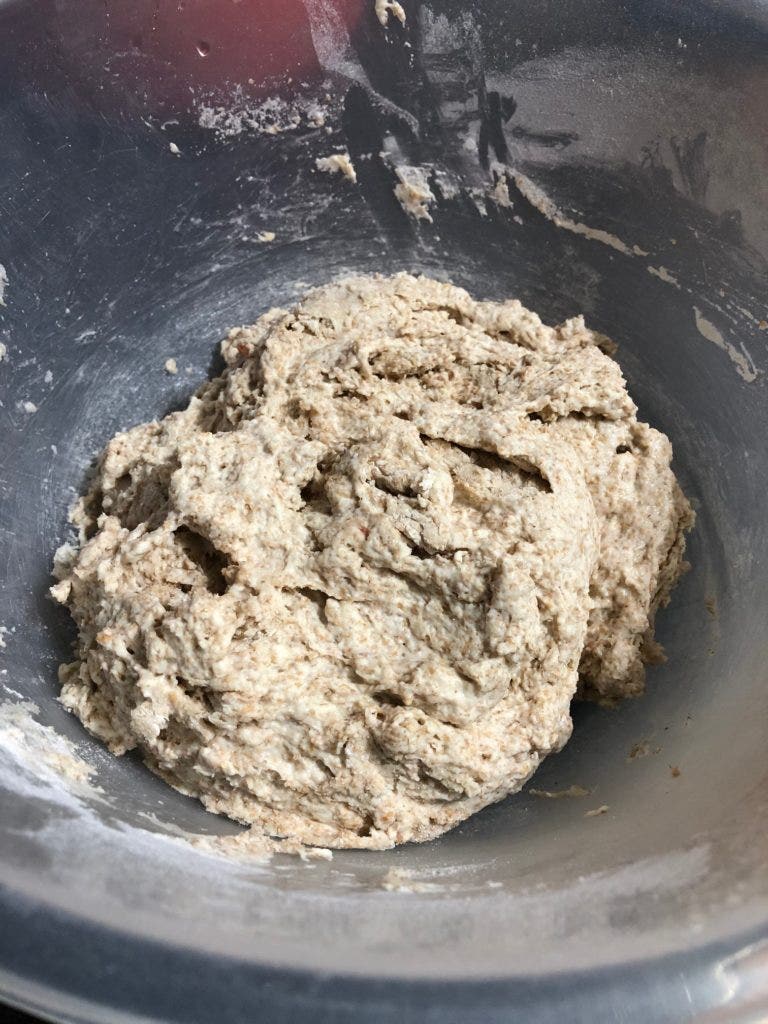 Mix it roughly with a wooden spoon, don‘t knead.
- Cover and leave overnight at room temperature. A tea towel is fine as a cover, but I find I get better results in all breadmaking by using an elasticated plastic shower cap (unused, of course!).
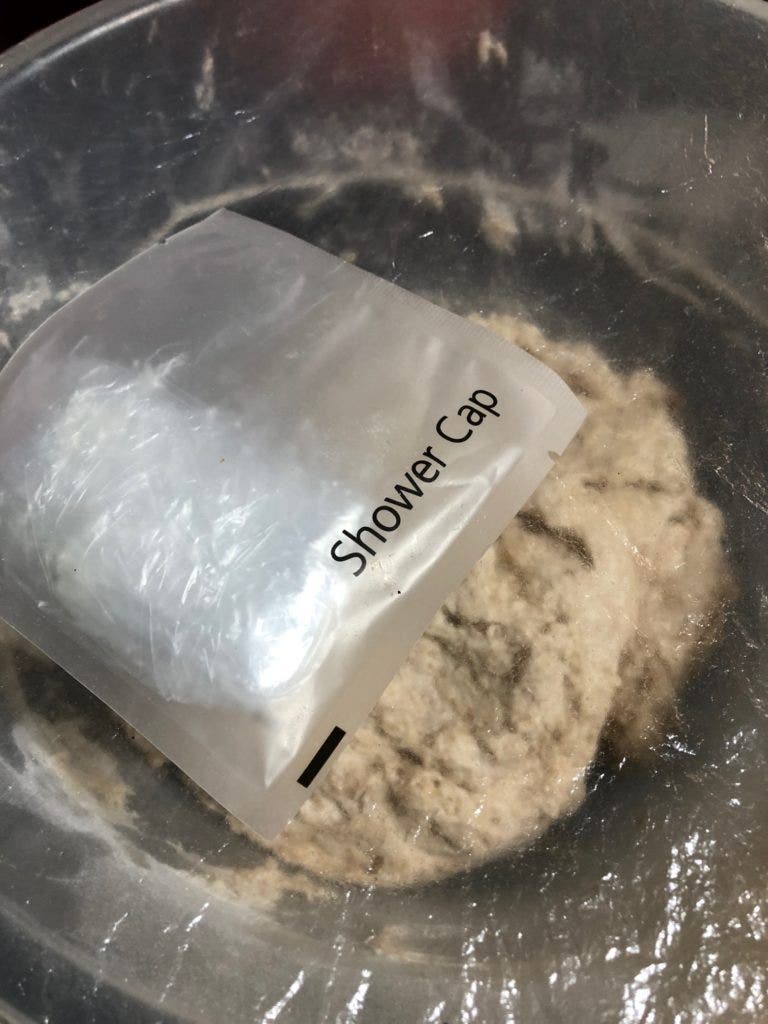 An unused plastic shower cap is perfect for breadmaking.
- In the morning, shape the loaf into a rough ball (again without kneading) and place it on a piece of floured baking paper to prove (rest) for an hour.
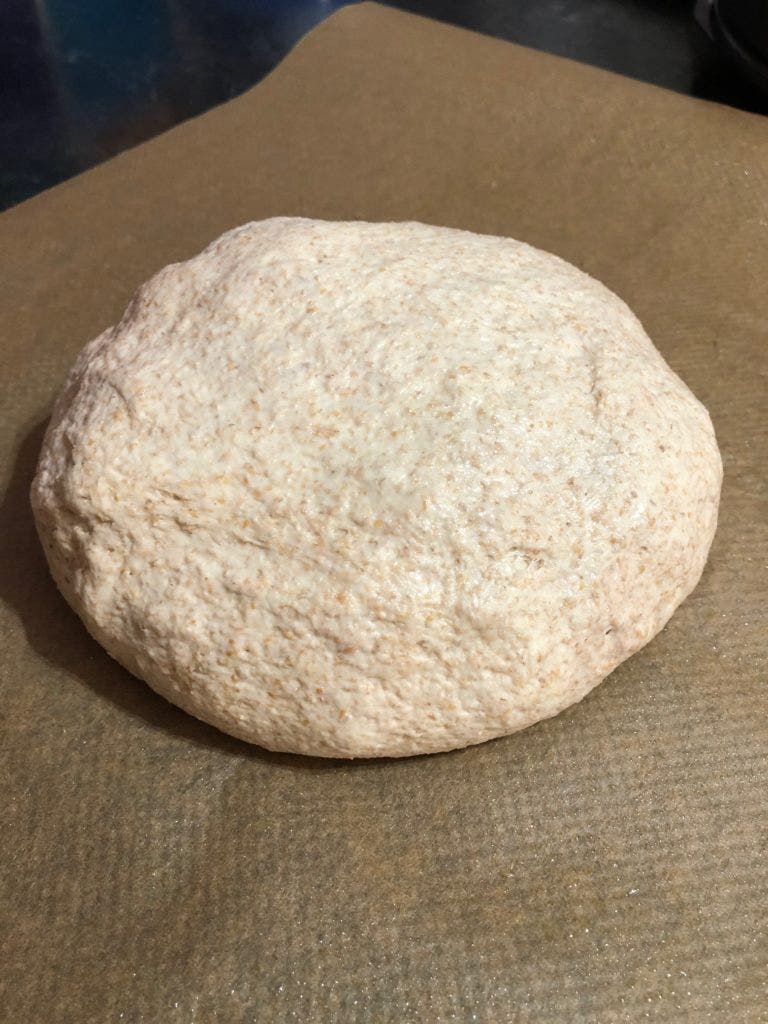 Shape the dough into a very rough ball.
- While the dough is proving, heat the oven to maximum and place a casserole dish, together with its lid, inside to heat up.
- After an hour, open the oven and carefully lower the dough into the hot casserole dish, score the top deeply with a sharp knife, put the lid on and close the oven.
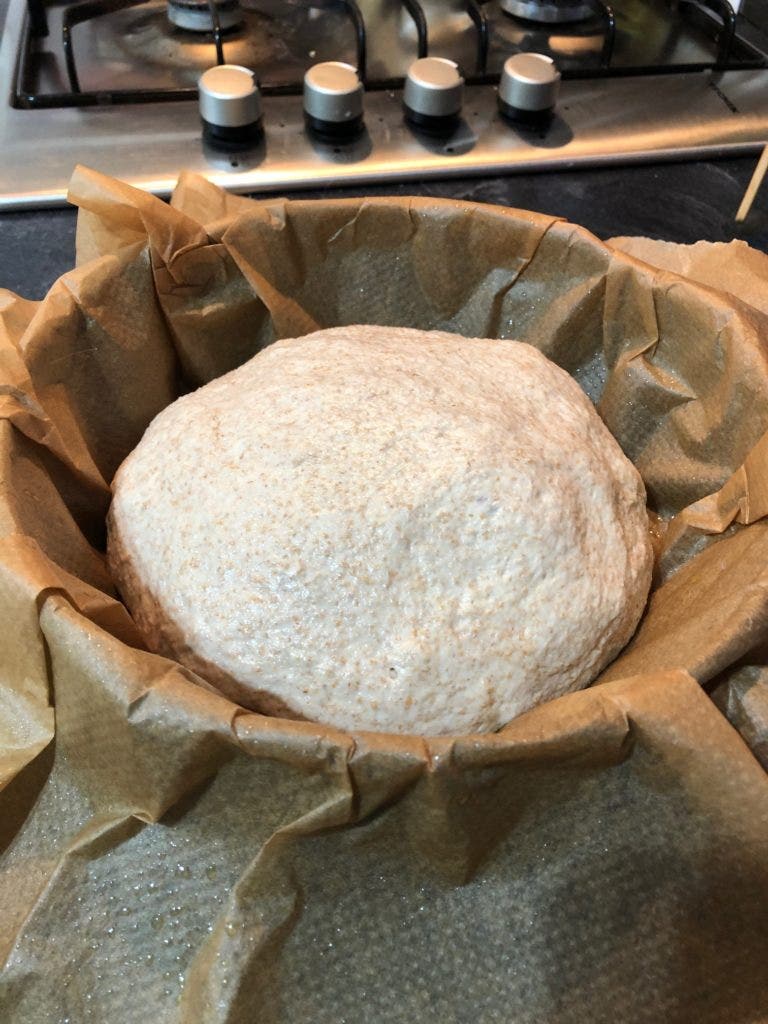 Carefully lower the dough into the hot casserole.
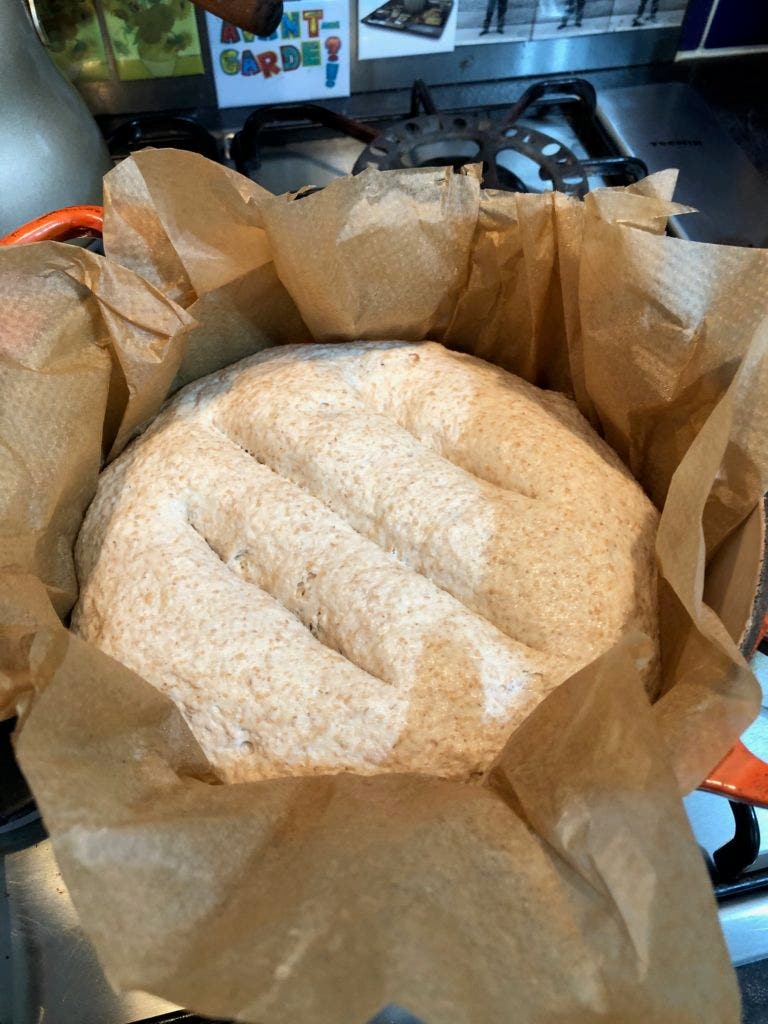 Score the top with a sharp knife.
- Bake for 30 minutes with the lid on, then take the lid off and bake for a final 5 minutes uncovered.
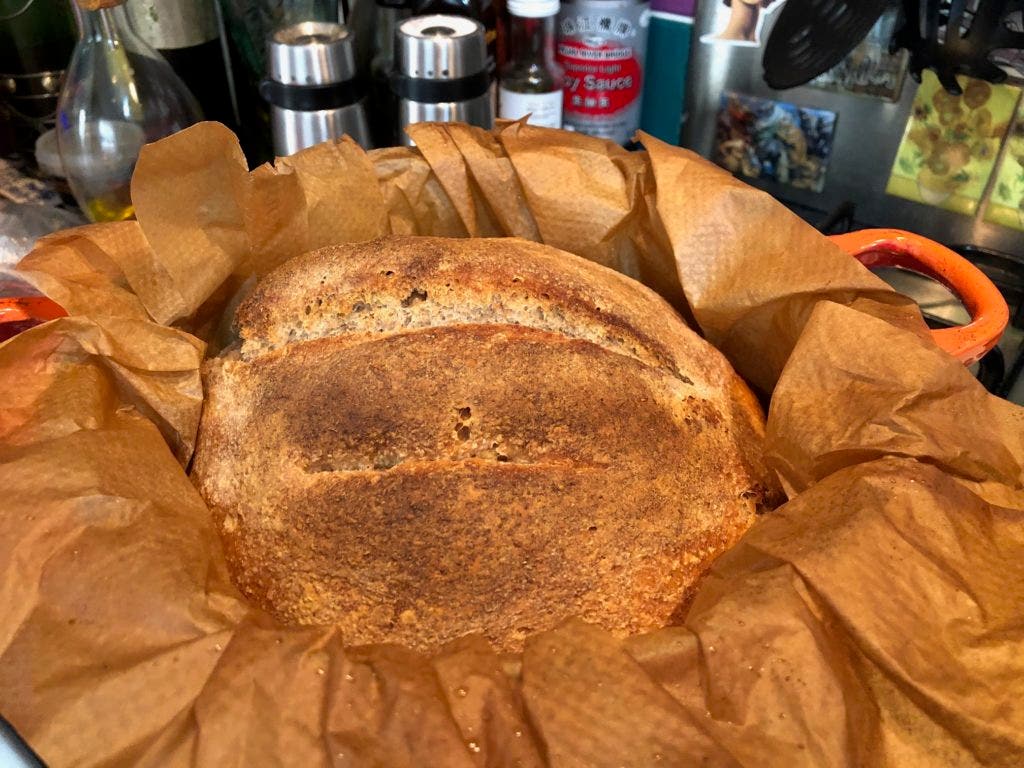 Bake for 30 minutes with the lid on, then 5 minutes uncovered.
- Place on a rack and allow to cool before slicing.
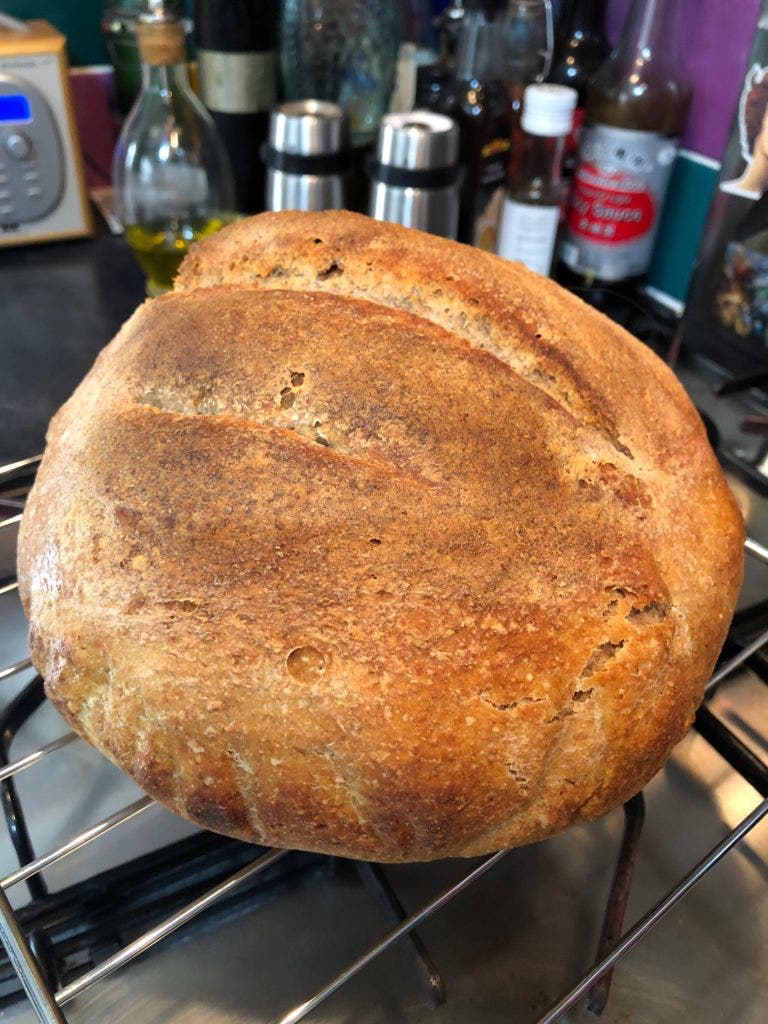 You really must resist and leave to cool before slicing!
Variants
This recipe, like most bread recipes, lends itself to all sorts of twists in respect of flavours and additions, all of which are made at the initial mixing stage. All you need to remember is that any dry ingredients or flavours (herbs, spices, nuts, seeds etc.) should be added to and mixed in with the flour and that any liquid, or semi–liquid, additives (honey, Marmite, peanut butter, harissa) are added to the water and mixed to dissolve before being added to the dry ingredients. Play around with quantities to suit your own taste, but a few of my favourite additions include:- 2 tablespoons of honey and a handful of chopped dates and walnuts.
- 3 tablespoons of Marmite (sorry to all haters…).
- A large handful of sliced green olives, sun dried tomatoes and shredded basil.
- Mixed sunflower and pumpkin seeds.
- 2 tablespoons of rose harissa.
- A grated raw parsnip and two tablespoons of finely chopped fresh rosemary needles.
- A small handful of poppy, sesame or onion seeds.
The sourdough variant
You can pay an eye–watering amount for an artisan sourdough loaf and although the price is worth it compared to purchasing bog standard supermarket rubbish, it is easy to make a sourdough version of the above loaf, and it elevates it to a whole new taste level.Sourdough bread relies upon using the natural, wild yeasts that are all around us in the atmosphere as the leavening agent, as opposed to the sachets of dried yeast (or sometimes fresh) that you can buy in a supermarket. Despite what some would have you believe, there is no alchemy involved and the process is very straightforward.
Making a sourdough starter
To get going you first need to create a sourdough starter and this is simply a case of mixing roughly 100g of flour with 200ml of lukewarm water in a plastic pot, for which you have a lid – I use a large, plastic gym shaker. Don‘t worry too much about the exact quantities and any flour will work, although wholemeal tends to give a faster result. Whisk the flour and water together and then leave it uncovered for an hour for yeast spores to accumulate, then pop the lid on and place the container somewhere warm – a warm kitchen is fine.Check the mixture every few hours or so until you can see small air bubbles popping on the surface of the mixture, a sign that fermentation has started. Depending on how much wild yeast was in the atmosphere when the mixture was exposed, and how warm the environment in which it was stored, fermentation can take anything from a couple of hours to a couple of days to get going, but get going it will.
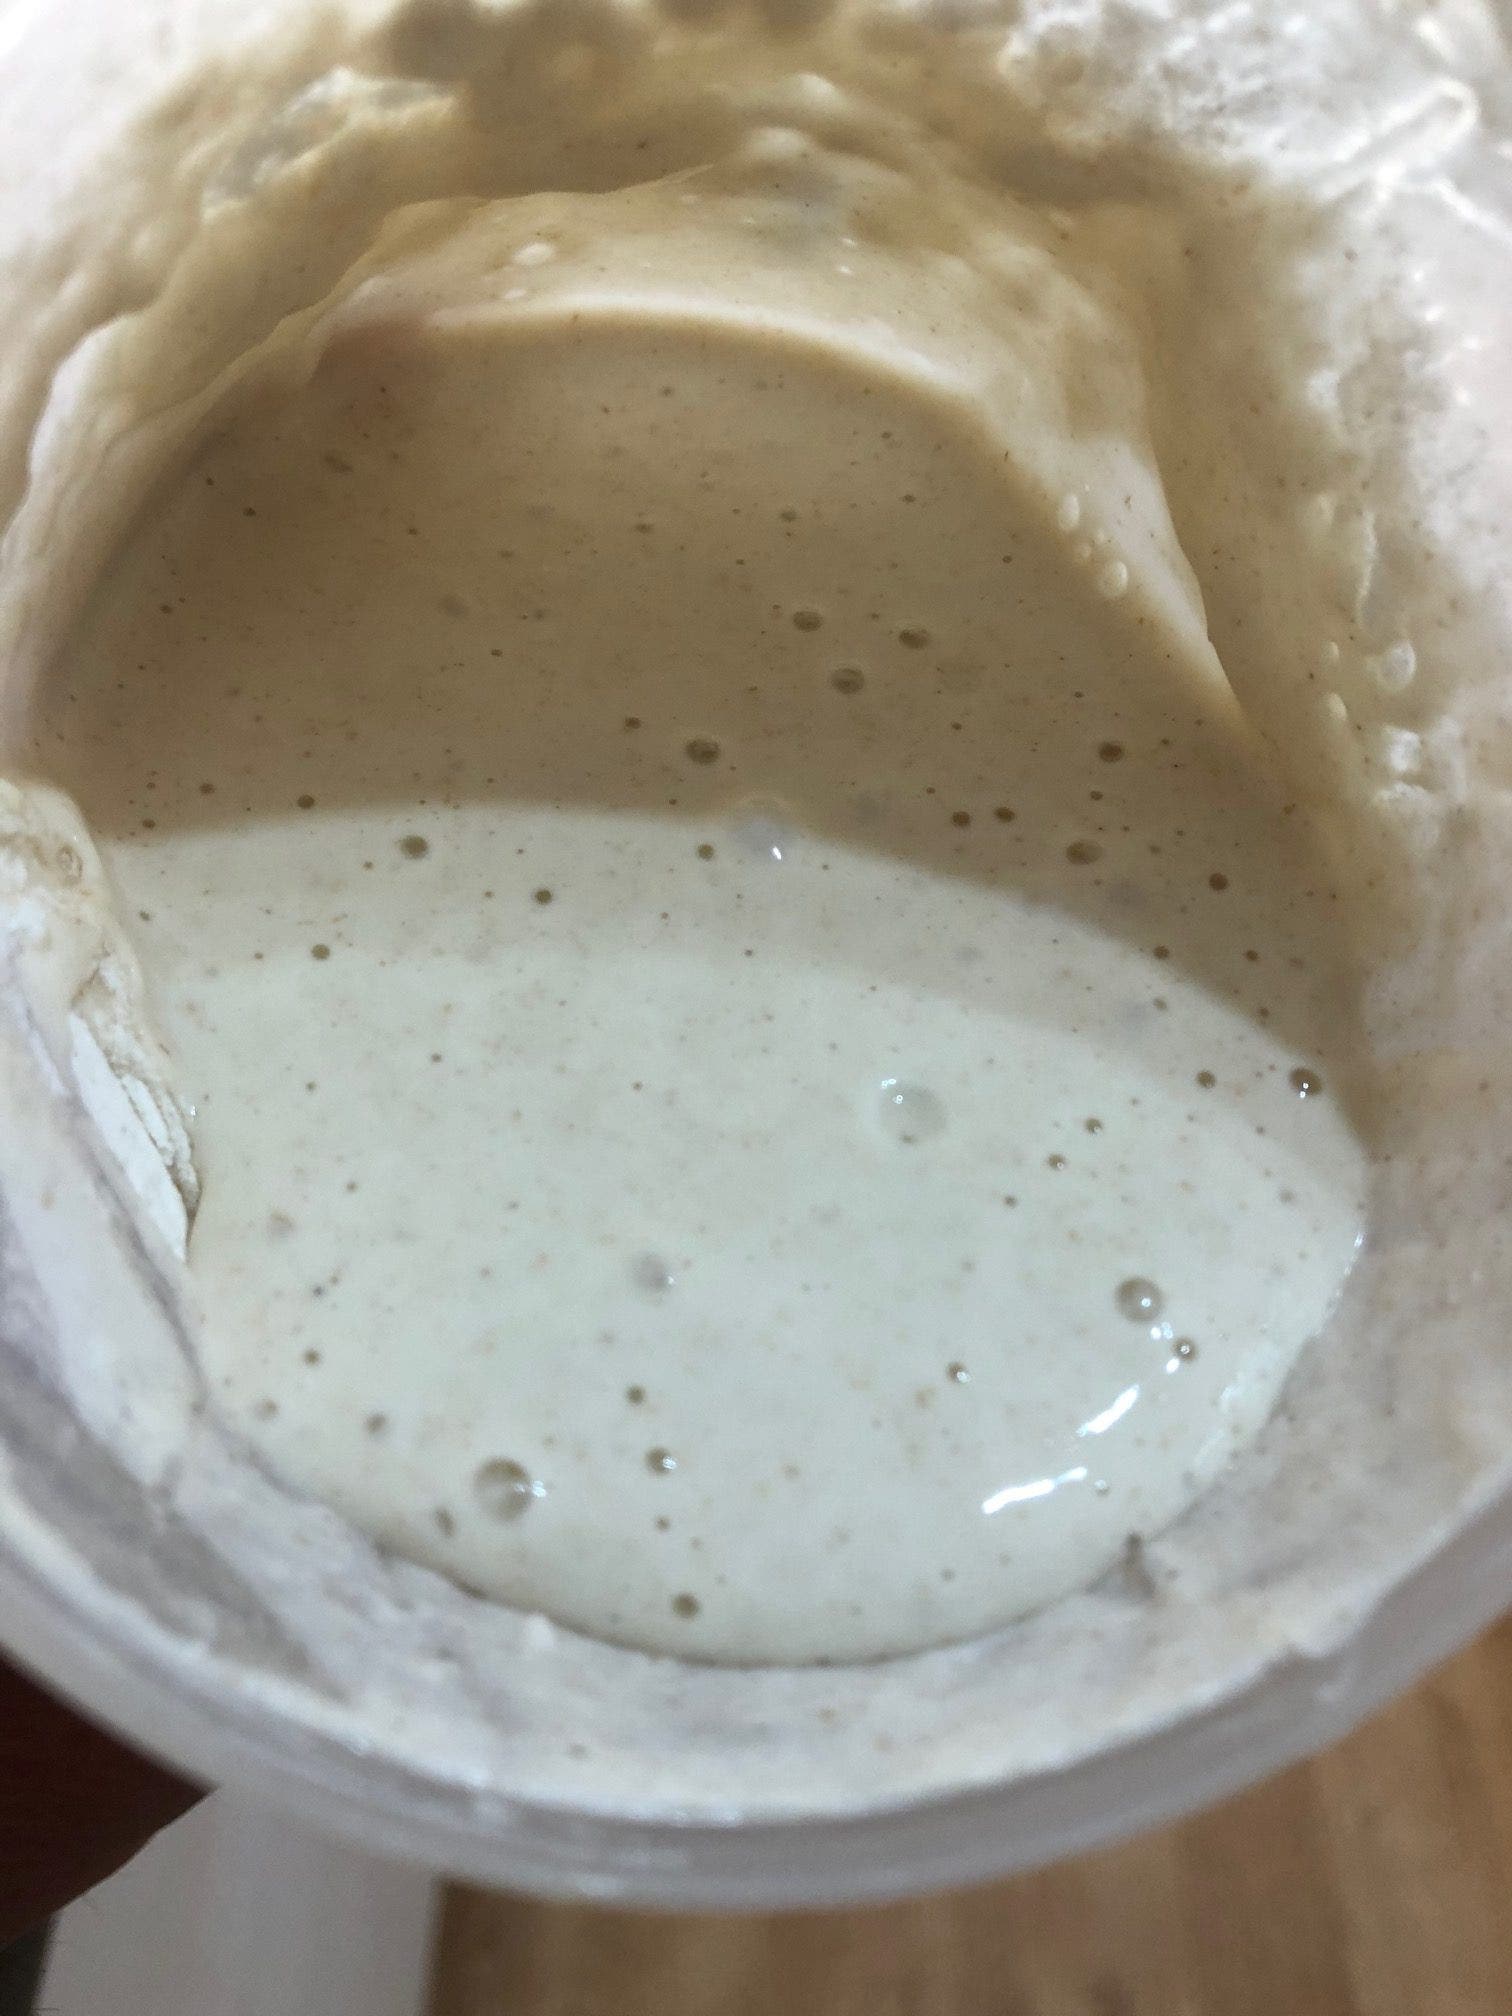 The bubbles mean that you have fermentation!
Once you have spotted the first sign of fermentation you have to feed your starter, and this is simply a case of whisking in another 100g of flour and 200ml of lukewarm water. At this stage, when your starter is young and becoming established, it will need to be looked at regularly and to keep it fermenting vigorously you should tip out and discard roughly half of the starter and top it up with fresh flour and water on a daily basis.
A unique smell
After a week it should be bubbling along nicely and have developed a distinctive aroma, perhaps sharp and vinegary, perhaps sweet, perhaps sickly – all active starters smell differently, all are good and all will give your finished loaf a unique taste and aroma. At this stage maintenance becomes minimal, I keep mine in the fridge at a thick, dough–like consistency to slow fermentation down and I feed it every couple of weeks – and remember, a sourdough starter is for life, not just for lockdown – mine has been going for over 20 years!To elevate the overnight loaf recipe above to a whole new taste level by making it a sourdough one, simply omit the 2g of dried yeast and add roughly 200ml of your sourdough starter. Depending on the consistency of your starter, you may need to add a little less water than the original recipe states, so it does pay to try the basic recipe first to familiarise yourself with the consistency you are looking for. I promise the result will be outstanding and, for about 50p a loaf, every bit as good as anything you will buy anywhere!
Don‘t be scared of breadmaking, and certainly don‘t be afraid of sourdough.


