
Many of us have been looking to become more self-sufficient during the COVID-19 pandemic, whether that’s growing our own fruit and veg, getting into home baking, or making use of the wonderful fish and game resources we are blessed with in the UK.
Fish smoking is something that I had been meaning to explore for many years and is a great way to make use of fish from the many stocked trout fisheries around the country. With awareness growing around the problems caused by open cage salmon farms, smoked trout is also a much more sustainable choice with a lower environmental impact. There’s so much information out there on fish smoking, and each individual should enjoy going through their own learning process, but through trail and error I have found the following method to give really fantastic results. I hope it inspires you to give it a go!
How To Smoke Trout
Step 1: Catch your trout
Quality produce always starts with quality ingredients, so be selective about which trout you’re taking for the smoker. I’ve found that grown-on resident rainbows and browns from large clean lakes or reservoirs are ideal. You’re looking for a lean, healthy, fully-finned fish that has spent a good deal of time on natural food, rather than a recent stockie. Caring for your catch after capture is also very important to preserve the quality of the meat. I like to carry a cooler with ice packs inside. As soon as the fish has been dispatched it goes straight into the chiller to ice down. Don’t leave your trout sweating in a bag all day. A good quality bass bag will also work, just make sure to use it properly - continuously wet the bag and allow it to start to dry before wetting it again, therefore allowing evaporative cooling to chill your fish. Leaving the bass bag in the water or hanging over the side of the boat all day will only serve to keep your fish at the same temperature as the lake water.
Check out the Wychwood Quick Drain Competition Bass Bag or even a YETI cooler to help keep your catch fresh.
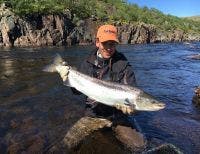
 A nice full tail on a grown-on reservoir brown trout.
Step 2: Preparing your trout
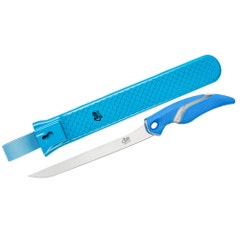
Whether you’re cold smoking or hot smoking, the first thing you need to do is fillet your trout. I find the easiest method is to fillet your fish without gutting them, simply slice the fillets away from the body. A good quality, sharp filleting knife is essential and I absolutely love the Cuda Fillet Knife and Sheath. Other useful items to have are the Snowbee Filleting Board, featuring a clamp to help hold slippery fish in place, and the Snowbee Hook and Knife Sharpener. There’s no need to skin, scale or pin-bone your fillets at this stage - you’ll find that much easier later on in the process. It’s a good idea to weigh your fillets at this point and write this information down if cold smoking. More on that later!
 Freshly filleted trout ready for curing.
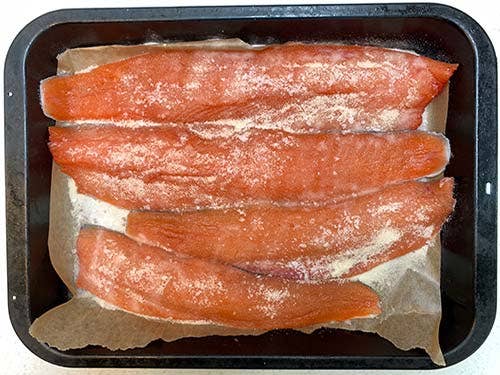
Step 3: Curing
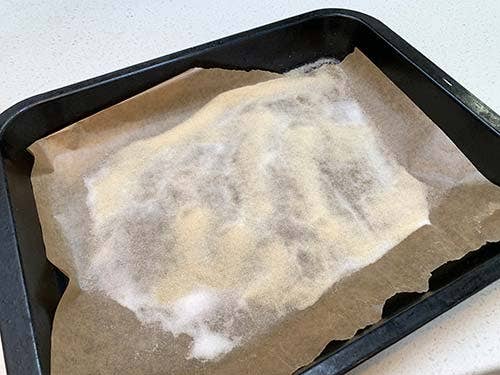
Again, whether hot smoking or cold smoking, the next step in the process is to cure your fillets. This draws out excess moisture and allows salt to penetrate into the meat, which in turn enables those lovely smoky flavours to get deep into the flesh. The curing process and length of curing time is very much up to you, but I’ve found a 4-hour cure works nicely for hot smoked trout, and an overnight cure (12 hours) is ideal for cold smoking. To keep things simple, I use a 50:50 dry cure mix of sea salt and brown sugar. Take a clean baking tray, line it with parchment paper and then spread a layer of your salt/sugar mix at the bottom of the dish. Next, lay your fillets on top of the mix skin side down. Then add another salt/sugar layer on the flesh side, giving them a lighter coating on the thinner areas near the tail and a heavier coating on the thicker parts. Pop your tray into the refrigerator and let the cure get to work.
This method is known as a ‘dry cure’ but you can also experiment with ‘wet cure’ methods, essentially leaving your fillets to soak in a strong salt/sugar brine solution.
Step 4: Rinse and Rest
After the curing process has worked its magic, you’ll notice a lot of liquid in the bottom of your tray - this is the excess moisture that has been drawn out of your fillets. Drain this away and then thoroughly rinse your fillets in fresh water before dabbing them totally dry with some kitchen towel. At this stage I like to put my fillets back into the fridge, uncovered, and leave them to chill overnight. This is quite an important step as it will allow a ‘pellicle’ to form on the surface of your fish. This looks like a tacky, glossy layer which the smoking flavours will adhere to really nicely.
 After a night in the fridge.
Step 5: Smoking
Hot Smoking:
Hot smoking is a simple process which involves fully cooking your fish while adding some lovely smoky flavour. Our Stainless Steel Smoker with Two Burners is the perfect tool for the job. Just add some Snowbee Smoker Oak Dust and your trout fillets should cook through in about 15-20 minutes. Alternatively, you can also use a BBQ: Light your BBQ and allow your coals to cool down so they’re no longer flaming. Pour a couple of handfuls of Snowbee Smoker Oak Dust into a piece of aluminium foil formed into a dish shape, and then place this on top of the hot coals. Pop your fish on the grill above and close the lid, while allowing a small area for ventilation. After 15 minutes or so you’ll have some stunning hot smoked trout to enjoy straight away! Try flaking it over a warm potato salad with hints of horseradish, capers and slices of pickled red onion. The smoked flesh should fall away from the skin and bones easily.
 Hot smoked trout.
Cold Smoking:
This method requires a bit more time and effort but the results are well worth it! Cold smoking is a much longer process which maintains the smoke, and your fish, at a cool temperature. This method, unlike hot smoking, does not ‘cook’ your fish, but cures it. It’s essential to keep your fish cool during this process to avoid spoilage (less than 10C) so I like to get my cold smoker going overnight. So, what equipment do you need for cold smoking? Simply put, you’ll need a container of some sort to act as a smoke chamber and a way to keep a steady stream of smoke going for a long period of time. I highly recommend a brand called ProQ who make a cold smoke generator and ‘Eco smoker box’ - perfect for getting started. The cold smoke generator will burn your wood dust at a steady pace and low temperature for around 12 hours, and the ‘Eco smoker box’ is essentially a cardboard box with some shelves inside! If you really get into your cold smoking, you can look at converting an old box or cabinet into your very own smoking chamber. There are lots of resources on the internet covering smoke chamber design.
 Pro Q Cold Smoke Generator
 Fillets in the cold smoker.
So, back to cold smoking your trout. I like to cold smoke my trout fillets for 24 hours. I set the cold smoke generator going at night for 12 hours and then pop the fillets back in the fridge in the morning. That night I repeat the process so they’ve had 24 hours in the smoke over a 2-night period. Breaking the process up like this with some refrigeration allows the flavours to develop.
At this point they’ll be smelling pretty good and they’re almost ready to eat! Remember weighing your fillets at the start of the process? Well, weigh them again now - the consensus is you’re looking for weight loss of around 15-20% to ensure they’re safe to eat. If they’re not quite there yet, I like to pop them in the oven with the extractor fan on (no heat!) to help with the final bit of dehydration.
After your fillets have reached the desired weight they should be quite firm, with a gorgeous, irresistible smoky smell! They should also have developed a darker, rich colouration from the smoke. This is the perfect time to pin-bone them as the small bones should pull out of the flesh nice and cleanly. Now they’re ready to be sliced and eaten or vacuum sealed and frozen for future enjoyment!
 After 24 hours cold smoking - ready to eat!
 Vacuum sealed for friends and family!