

Ed's Guide to Hitting High Birds
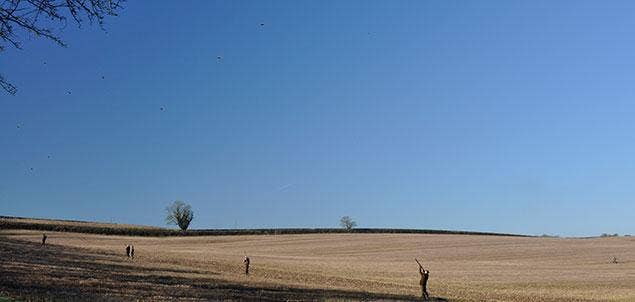
For me, exactly how you define a ‘high’ pheasant is very a subjective thing, it depends on where you are shooting and who you are asking. Shooters, as a rule, tend to massively overestimate ranges and to many 40 yards is an ‘average’ bird. This may be the case if you are routinely shooting in Exmoor, Yorkshire or parts of Wales but for more local shoots with less impressive topography a 40-yard bird will rarely be seen - unless you are shooting someone else’s bird!A good way of seeing just how high 40 yards straight up is, is to go to Sporting Targets in Bedfordshire and stand under the highest tower- it is 40 yards to the top - and you suddenly realise just how high that is. Most of the clays you shoot at will be no higher than 30 yards as they will have dropped by the time they get to you.
Personally, I would class 40 yards as a good, high bird but there are now several shoots showing considerably higher where the line of guns is put in a valley and the birds are presented overhead. It is this kind of height that I will be basing my comments on here to give you a good starting point and, hopefully, to help you to bring a few of those birds down.

Feet and stance
For me everything starts with footwork; think of this as your foundation - if your feet are wrong the rest of the shot is likely to be unsuccessful too.Presented with a straight-driven bird, I position my feet slightly more side-on than I would if I were shooting a crosser. Draw a line between the ends of both of your feet and it should point out towards 11 on a clock face for a right hander, or to 1 o’clock if you are a 'leftie'.
Distance between the feet should be no wider than shoulder width, more than this can restrict the movement, which is much needed on these shots.
I tend to keep weight distribution pretty much 50:50 between the feet, shifting slightly onto the back foot as the shot develops to help maintain a solid, smooth gun movement. As the gun approaches vertical, push your hips into the shot, allowing your shoulders to drop back slightly to give you increased room at the back end of the swing.
Shooting Method
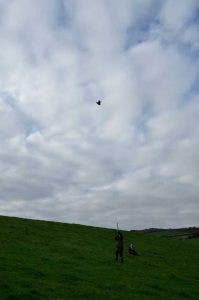 Falling Pheasant © Outside Days
For driven birds my ‘go to’ technique is to swing through. This is where you deliberately start behind the bird and accelerate through it, opening-up into your forward allowance (lead).
The worst thing you can do with shooting is to rush. Identify your chosen bird with the gun out of your shoulder; during this time, adjust your feet to make sure you are working from a solid base then, as the bird approaches 10 o’clock, slowly mount, inserting a couple of yards behind the bird. Hold that picture for a split second then smoothly and confidently accelerate through the tail feathers and then the beak, continuing to push past the bird - firing when you get to the desired lead. KEEP MOVING! If you slow down, or stop, the bird will catch your gun up and you will likely miss behind.
I have deliberately not mentioned lead as everyone perceives it differently and it depends very much on gun speed, timing and your reaction. Find out what works for you.
Remember that a perfect move with an imperfect lead can bring plenty down, whereas focussing too much on an inch-perfect lead with poor mechanics will never work.
Reading the bird
As mentioned above, the first thing to do before you start to move your gun is look at the bird. This is for two reasons. Firstly, to allow for correct foot placement and secondly, so you can see what the bird is doing. Very rarely is a bird dead-straight and as such you need to adjust accordingly. Just as many birds are missed off line than due to under/over leading. If you can see the bird has a curl, or is sliding on the wind, start by moving through the leading wing, i.e. if it is curling left, then drive through the left wing. You will be surprise on some high birds just how far off line you need to shoot in order to connect!Where to shoot?
On higher stuff, I tend not to attempt to shoot well out in front which, as I see it, makes an already hard shot even harder. I prefer instead to take two steady, controlled shots at about 11 o’clock for the first and 12 o’clock for the second. With a good stance this gives you lots of room to not only take the shot but to continue your swing and finish the shot, which is of vital importance. Do not rush!Shooting Equipment
If you are choosing high birds it is your responsibility to come prepared and give yourself the best chance of achieving a clean kill.Barrel length offers no ballistic advantage but does aid in a nice smooth swing as a longer barrel is a little more ‘pointable’ than a shorter one. I use 32in but 30in is also fine.
Chokes are based somewhat on your cartridge selection but as a good guide, shot sizes 5 or 6 can be choked quite heavily with good results, so between half and full is great.
Bigger shot (of which I am a fan - especially later in the season with bigger, stronger birds) tends to respond less well to choke and my preferred shot size of 4 seems to perform optimally through a half choke.
Early season I prefer 32/34g Hull High Pheasant Extreme in 5s (for me 6s are too small for tall stuff) moving up to 36g 4s later in the season. On ‘really’ high stuff, Hull Ultramax 42g 4s are unequalled in stopping power for extreme height but are smooth enough to avoid a headache!
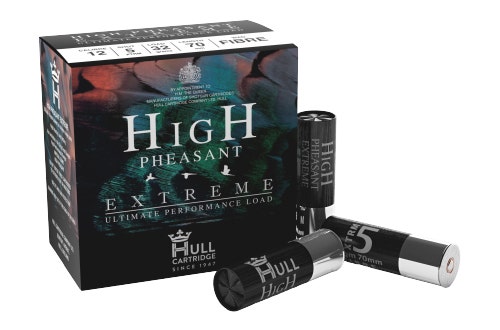 Hull High Pheasant Extreme
Shooting Ethics
It is inevitable with all game shooting that there will not always be clean kills with every shot and this is especially relevant when shooting over greater distances. We can never avoid it, but it is our responsibility to go as far as we can to minimise it. Paying attention to the following four points should help you to do right by your quarry and give the best chance of a quick, clean end:1. Practice! There are some great venues to practice genuinely high driven targets at clay grounds across the U.K., my favourites being Sporting Targets in Bedfordshire and the Royal Berkshire Shooting School. Throwing yourself in at the deep end on your first day of the season is not just optimistic, it is foolish and shows a lack of respect for the game. For the price of a few good pheasants you can have several decent practice sessions, or even book with a recognised coach to iron out any early season faults.
 Sporting Targets in Bedfordshire, an ideal practice ground.
2. Stick with one bird Once you have picked your intended bird, stay with it until it has folded or you have sent a second barrel at it. Jumping between birds will only serve to make you take rushed, poorly executed shots and it increases the risk of missing the chance to finish off a pricked bird.
3. Know your limits! Shooting birds wildly outside of your ability is as bad as, and arguably worse than, shooting low birds. Of course you will get the odd skyscraper come down, usually with a single pellet in the eye or under the chin, but for every one of those there will be dozens that just get pricked and die a long death, which is totally unacceptable. If in doubt, don’t shoot.
4. Pick the right kit. One of my pet hates is seeing people turn up on renowned high bird shoots armed with 28g 6s and open-choked guns. As with shooting out-of-range birds, you often hear of people telling with great pride of the 70-yarder they shot with an ounce of 7s and a 1/4 choke, that came down stone dead. This is little more than a fluke, a single pellet normally finding its way to the head is the cause, and countless will have been injured in the process. I would use a minimum of shot size 5 and enough choke that when combined with your shell of choice can consistently perform at the outer limit of your chosen range. Later in the season I like 4s as it helps get through all the extra feathers and bring down stronger birds.
Good luck and straight shooting!
Ed
2018-01-09 17:59:23
1950 view(s)