

Us salmon fishers have now been stuck on the couch, or at the fly tying vice, for a good part of this year’s spring salmon fishing season here in the UK. As we look forward to the day when we can finally jump into our waders again and head to the river, now is a great time to brush up on our fish-handling skills.
As a community we’ve all come on in leaps and bounds since the ‘bad old days’. Across the board, the way that we conduct catch and release is certainly in a much better place than it was in the past. We’re now more aware than ever of salmon physiology and how to net, unhook and return fish successfully to ensure they go on to survive, spawn and help create the next generation of Salmo salar.
With the threats facing wild Atlantic salmon now more severe than ever before, it‘s imperative that we do our best to maximise the efficacy of catch and release. Studies from around the world on the survival of caught and released salmonids (including Atlantic salmon, steelhead and trout) have shown that, when done correctly, post-catch mortality can be as low as 1-2%.
There are some things which affect mortality that we can’t control, such as hooking location, but there’s one big factor (in fact THE most important factor) that influences mortality more than any other - that is air exposure. If a salmon is to be returned, the single most important thing you can do to ensure it goes on to survive and spawn is to minimise air exposure.
We’ve all made mistakes with clumsy fish handling in the past, and we can all continue to improve, but what I aim to show you with this article is just how easy minimising air exposure can be. Not only will it keep your salmon fit and healthy for a successful release, but it will also make life easier for you when handling the fish and also result in a better photographic memory. In the age of salmon conservation, when a photo of our trophy is how most of us seek to remember our catch, minimising air exposure will result in a better looking fish and better looking photographs.
Here I’ll run through some common mistakes people make and how to do things a bit better. I’ll show you some ‘good’ and ‘bad’ examples of fish handling, the ‘bad’ examples having been staged with a rather ridiculous salmon-shaped cushion… you get the idea!
Landing your fish
Before we can even think about pouncing on our hard-earned bar of silver and getting the perfect photo, first we have to get it in the fishing net! This is the first key opportunity to minimise air exposure. Once your fish is in the net, keep that fish and the net in the water! Trust me, unless you have an enormous tear in your net bag, that salmon is not going anywhere. Your salmon has expended a lot of energy in the fight and hauling it straight up onto dry land is completely unnecessary. Keeping your fish in the water will not only allow it to recover its strength, but it will also make your life much easier when it comes to unhooking the fish. A fish that is flapping about on dry land is much harder to unhook than a fish still in the water, believe me!Here’s an example of how not to do it, and what doing it right should look like:
Once the fish you’re netting (or the fish your fishing buddy is netting for you) is in the net, keep it in the water. Take a moment to breathe in the satisfaction of having caught a salmon. As long as that fish is in the water, there’s no rush to do anything. Place your fly rod down somewhere securely, roll up those sleeves and get ready to take a closer look at your prize.
Unhooking your fish
This is the next stage of ensuring a successful release and your next opportunity to minimise air exposure. I’m not sure there are many salmon fishers out there today who don’t wear chest waders, so make use of them!Get into the water with the fish, do not bring the fish on land to you. Of course, there is the odd situation where the nature of the riverbank or the water in front of you may make this unsafe, but for 99% of the time you should be getting into the water to unhook your fish.
Handle your salmon as little as possible, and always with wet hands, while you unhook it. You’ll find that a fish that has been allowed to rest for a short time in the net will be much calmer and easier to deal with. If you have a particularly feisty one, turning your fish upside down in the water will briefly disorientate it, giving you a few moments to get the hook out without too much of a struggle.
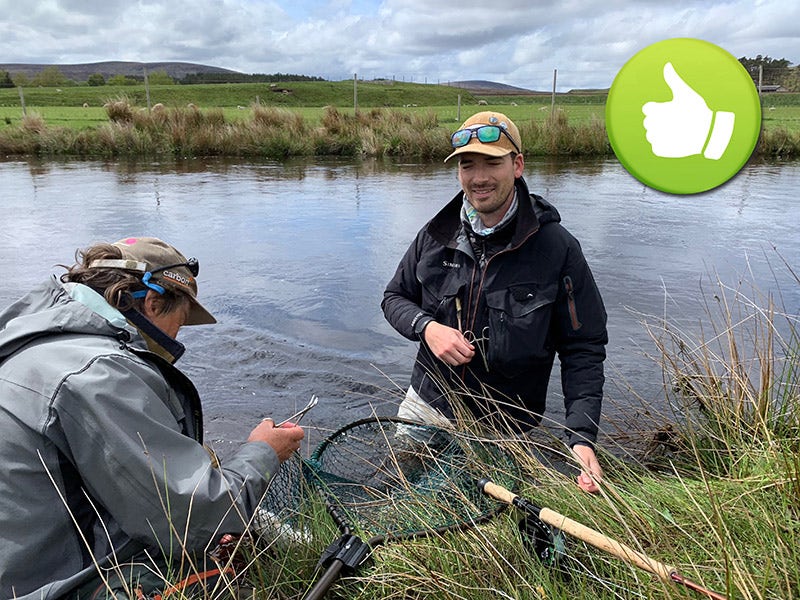
Here’s a snap from a salmon just having been netted on the Helmsdale last season. Note how the net is hanging over the bank and the fish is still in the water. Both ghillie and angler have got down into the water with the fish. As the ghillie is unhooking the salmon, the angler can get into position for a photo if desired.
Getting in position for your trophy shot
 You may wish to release your salmon as soon as it has been unhooked, carefully allowing it to swim out of the net or holding it gently facing upstream until it swims off. Never ‘pump’ a salmon back and forth in the water.
This can force water the wrong way through its gills. All you have to do is gently cradle it in an area of steady flow and your fish will swim off when its ready. If you’re not after a photo of this particular fish, there should be no reason to have exposed it to air at all.
If you’d like a photographic memory of a special fish, that’s absolutely fine, and this is now the next opportunity you have to minimise air exposure. Here’s a good photo that illustrates getting into position for a photo, the fish having never left the water until this moment. Again, you probably have chest waders on, so use them!
Holding your fish for a photo
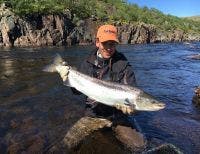
This is your next chance to minimise air exposure and get a beautiful photo of a healthy looking salmon. Thus far, your fish hasn’t left the water and you are ready in position. Ensure that your designated photographer has their camera or phone all set up and ready for the shot before you take hold of the fish.You may wish to ‘Keep ‘em Wet’ and hold your fish in, or just above the water for your photo. This is a great way to take a really nice looking shot, whilst keeping your fish calm and keeping air exposure to zero.
Here are a couple of examples of this type of photo:
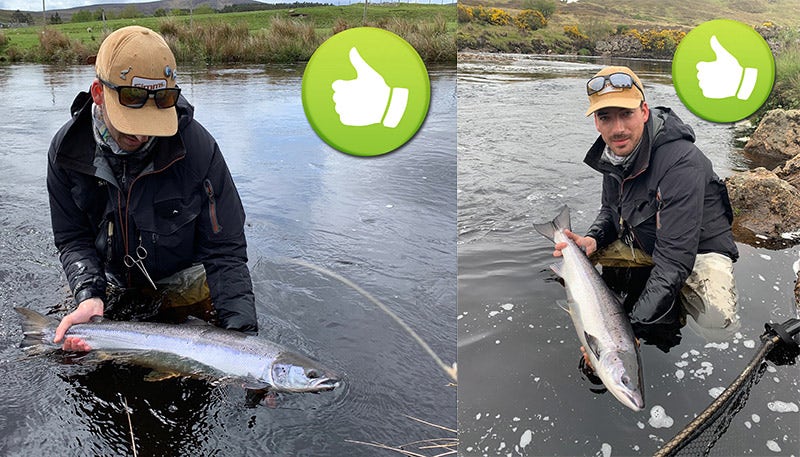
If you do want to hold your fish above the water, this is fine, but there is a technique I like to employ to make sure I’m keeping air exposure to a minimum. If your photographer is ready, you should only have to lift your fish out of the water for 2-3 seconds for them to snap a few pictures before lowering the fish back down into the water (use burst mode on your smartphone if you have this feature!). If you want to be sure you’ve nailed that shot, lift you fish above the water again briefly for another 2-3 seconds.
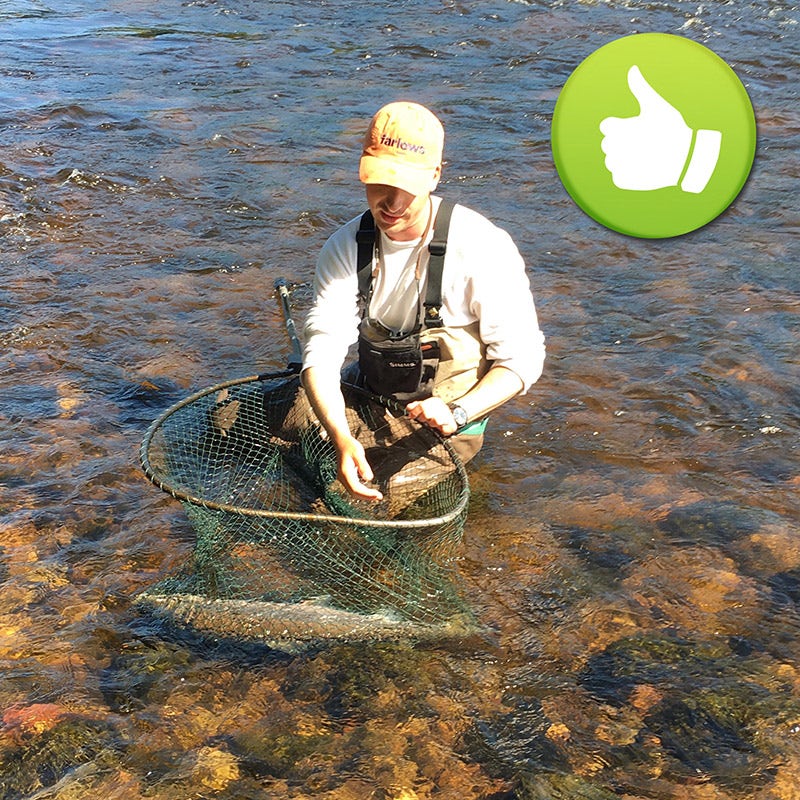
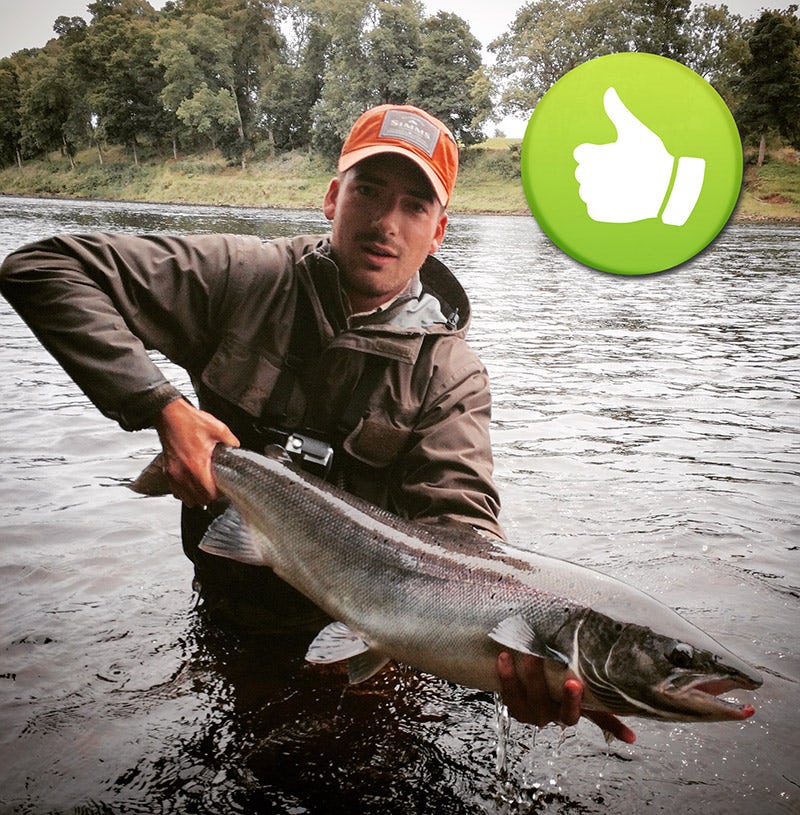 I like to imagine that I’m exposing the fish to as much air as if it had been attempting to leap a waterfall. Air exposure of any longer than 5 seconds really shouldn’t be necessary if you’re doing it right. I like to make sure my photos meet the ‘Drip Test’.
If you’ve successfully kept to the ‘5-second rule’ you should be able to see water dripping from the fish in your photos. Here’s a good example, look closely and you’ll see the drips!
Once you’ve got the shot, it‘s time to release your fish. Take pride in your catch and release technique as part of the overall salmon fishing experience. There are many elements that go into making catching a salmon satisfying, from choosing the right salmon fly and making a good cast, to good fish handling and a healthy release.
Common Mistakes
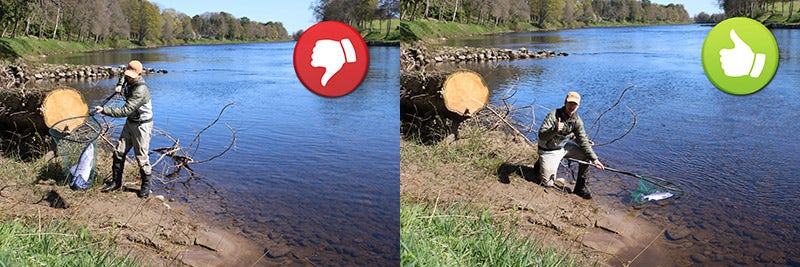
So that’s how to do it. Let’s take a look at some common mistakes and the reasons these should be avoided:Mistake Number 1 - ‘On the Grass’
The first photo shows a fish lying on its side on dry land - this must absolutely be avoided. Not only does this cause unnecessary air exposure but it also risks removing and damaging the salmon’s protective mucus, putting it at greater risk of developing a fatal fungal infection after release.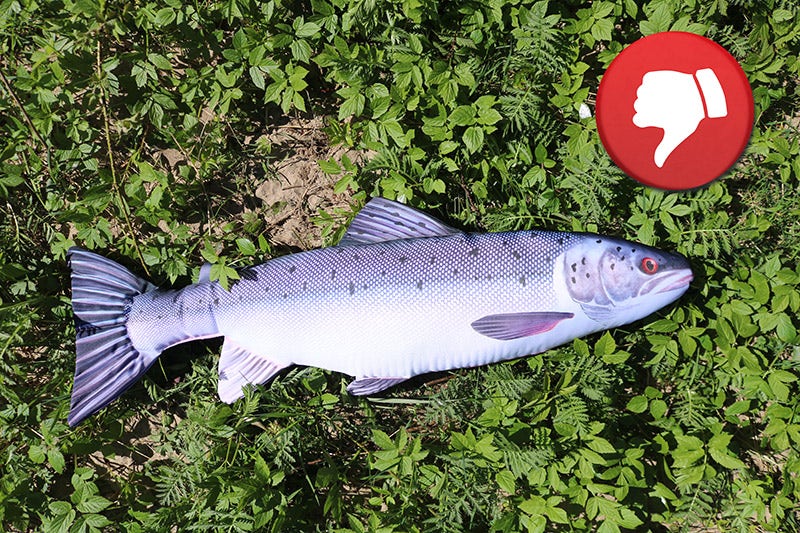
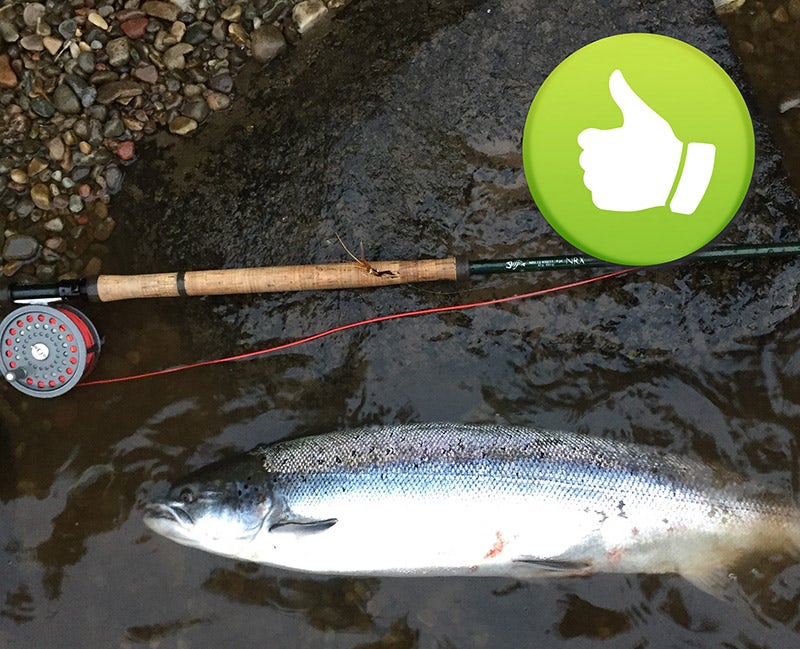
This is a common mistake made by anglers fishing alone who want to take a photographic record of their catch. If you find yourself in this situation, keep your fish in the shallows, either in the net or just resting on the shore, with some part of the fish in the water at all times.
Here’s an example of what it should look like:
 (Photo courtesy of Robert White, Head Ghillie at Benchil, Catholes and Pitlochrie, River Tay)
Mistake Number 2 - ‘On Dry Land’
In the example on the left, the angler has made two errors. The first is that the fish has been taken too far from the water, resulting in unnecessarily long air exposure. The second is that the angler is holding the fish at torso height. If the fish were to kick free from the angler’s grip, there would be a nasty fall back to earth, risking damage to the fish.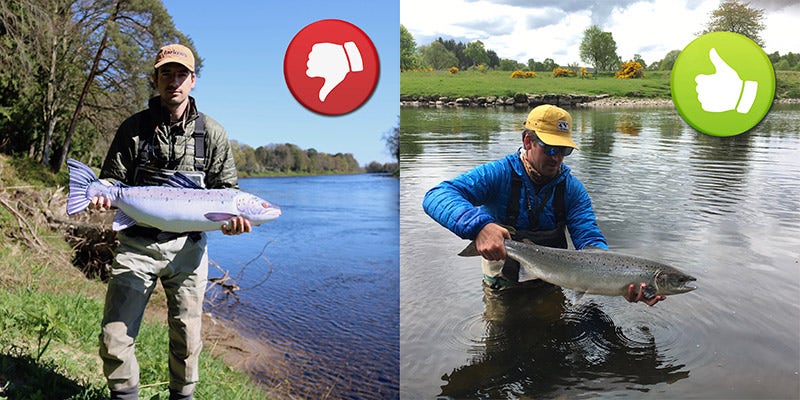
The example on the right demonstrates how it should be done, with the angler in the river, briefly holding the fish above the water for a few quick seconds. (Remember the ‘Drip Test’!)
Mistake 3 - ‘The Bear Hug’
This is a common mistake made by those less experienced salmon fishers who don’t have as much confidence in handling fish. Don’t be too hard on yourself if you’re learning - we all made mistakes at some stage! The problem in this instance is too much contact between the fish and your clothing, resulting in the possible removal of the salmon’s protective slime. You should be striving to keep your fish away from any dry surfaces at all times.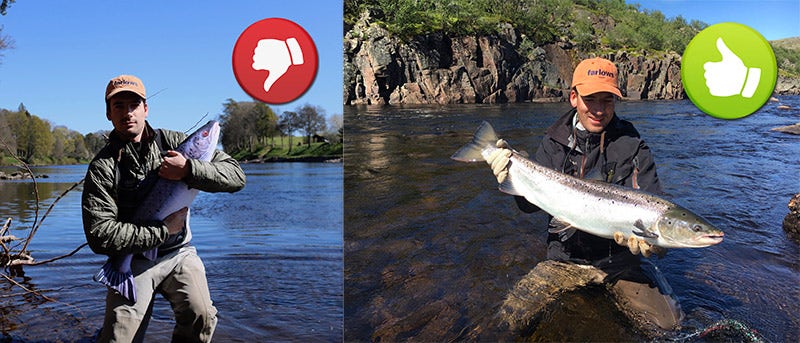
Be confident and decisive when handling a salmon. With wet hands, grip it firmly but gently around the ‘wrist’ of the tail and support the fish’s body with your other hand just behind the head, taking care not to squeeze or place undue pressure on the internal organs. A good example of how to do it is shown above, right.
Hall of Shame
We all make mistakes from time to time, and this blog is designed to help us all, as a community, improve the way we practice catch and release so that future generations can continue to fish for wild salmon. There will be times that things don’t quite go to plan, and that’s OK. Don’t be too hard on yourself or others, especially if they’re just starting out.There are however some real ‘Hall of Shame’ examples floating around on the internet. Here are a couple:
The ‘Hand in the Gills’
Your fingers should never, I repeat NEVER, come into contact with the gills of a salmon if you intend to release it. It needs these delicate organs to breath, so don’t mess about with them!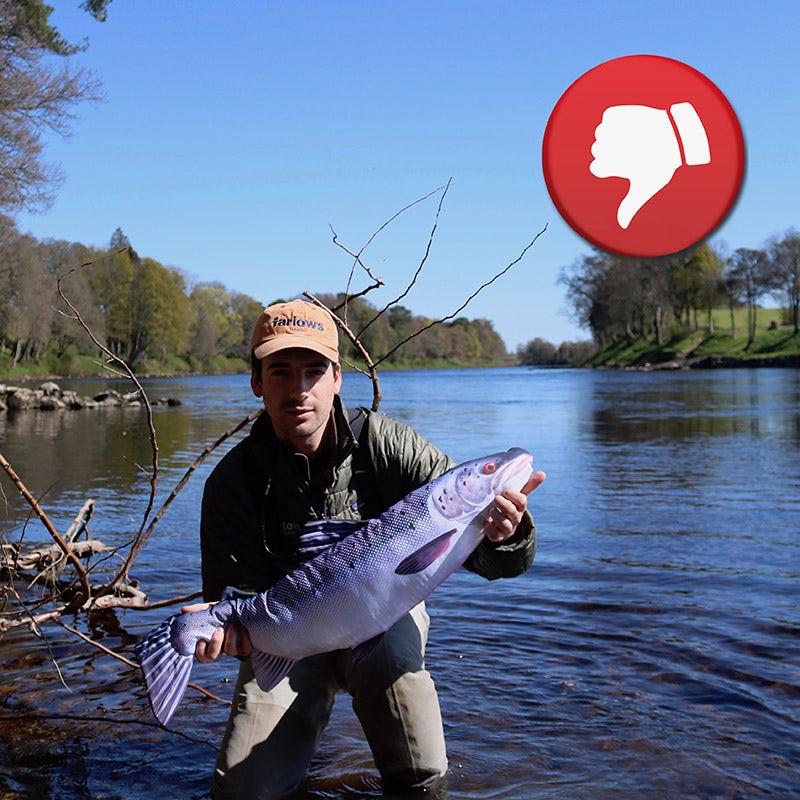
The ‘Tailer’
This looks really old school now, and thankfully doesn’t happen that much these days. Never lift a salmon that is to be released by its tail. By doing this you risk causing damage to the spine and internal organs - a sure fire way to increase post-release mortality.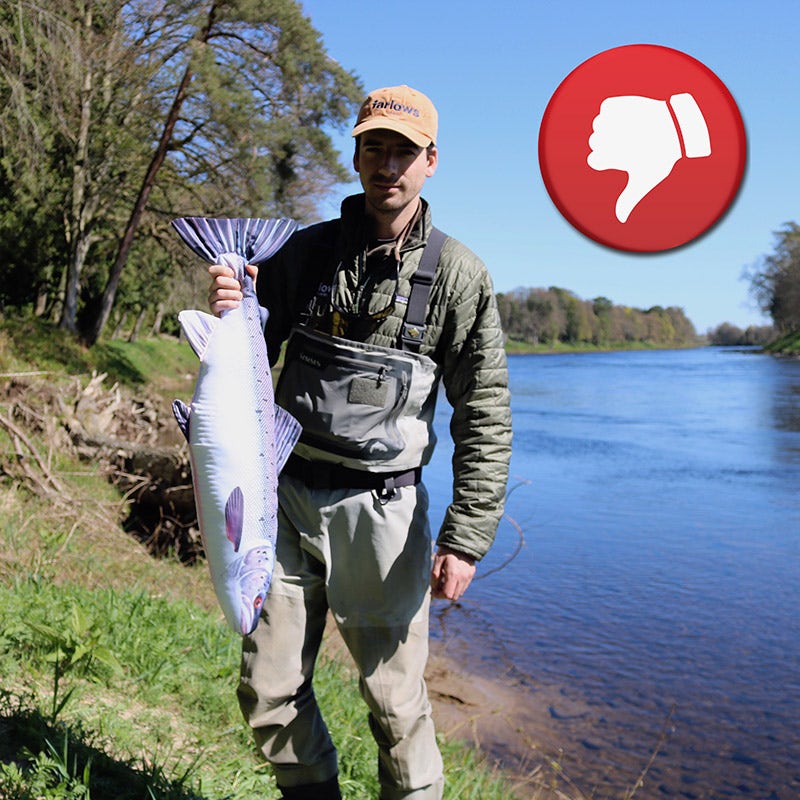
Final Thoughts
We all started out somewhere and we can all continue to strive to improve our fish handling and catch and release technique. If you see examples of poor fish handling, don’t start an online witch hunt.Help your fellow anglers by making constructive suggestions on how they can improve their technique. It’s our responsibility, as stewards of the current, most threatened population of Atlantic salmon, to maximise the survival of caught and released fish.
There are numerous examples of tagged fish recapture that illustrate that good catch and release technique not only ensures that fish go on to spawn the next generation, but can also enable another angler further upriver to have a bit of sport too. Some studies have shown that fish that have been caught and released numerous times have then been recaptured as kelts (post-spawn fish), proving that they have gone on to spawn successfully.
If you follow the guidance laid out here, I truly believe that you will take greater satisfaction in the overall salmon fishing experience, knowing that you came face to face with one of nature’s most amazing creatures, tempted it to take your fly, handled it with love and care, and watched it return to continue its epic life journey. After all, the fish you catch a few years down the line may well be the offspring of the fish you just released…
2020-05-04 15:31:28
482 view(s)